Welcome to the Base JS SDK documentation. In this section, we will introduce how to develop a Base plugin and master 80% of the concepts and core concepts of Base plugin development. NPM Address
Prerequisites:
- Basic knowledge of front-end development: HTML / CSS / JS
- React (Students using UI frameworks such as Vue can also create plugins)
Recommended learning:
Core Knowledge
Before we start building the currency conversion plugin, let's first understand the core concepts and related knowledge of multidimensional tables.
The following diagram shows the design model of the API:
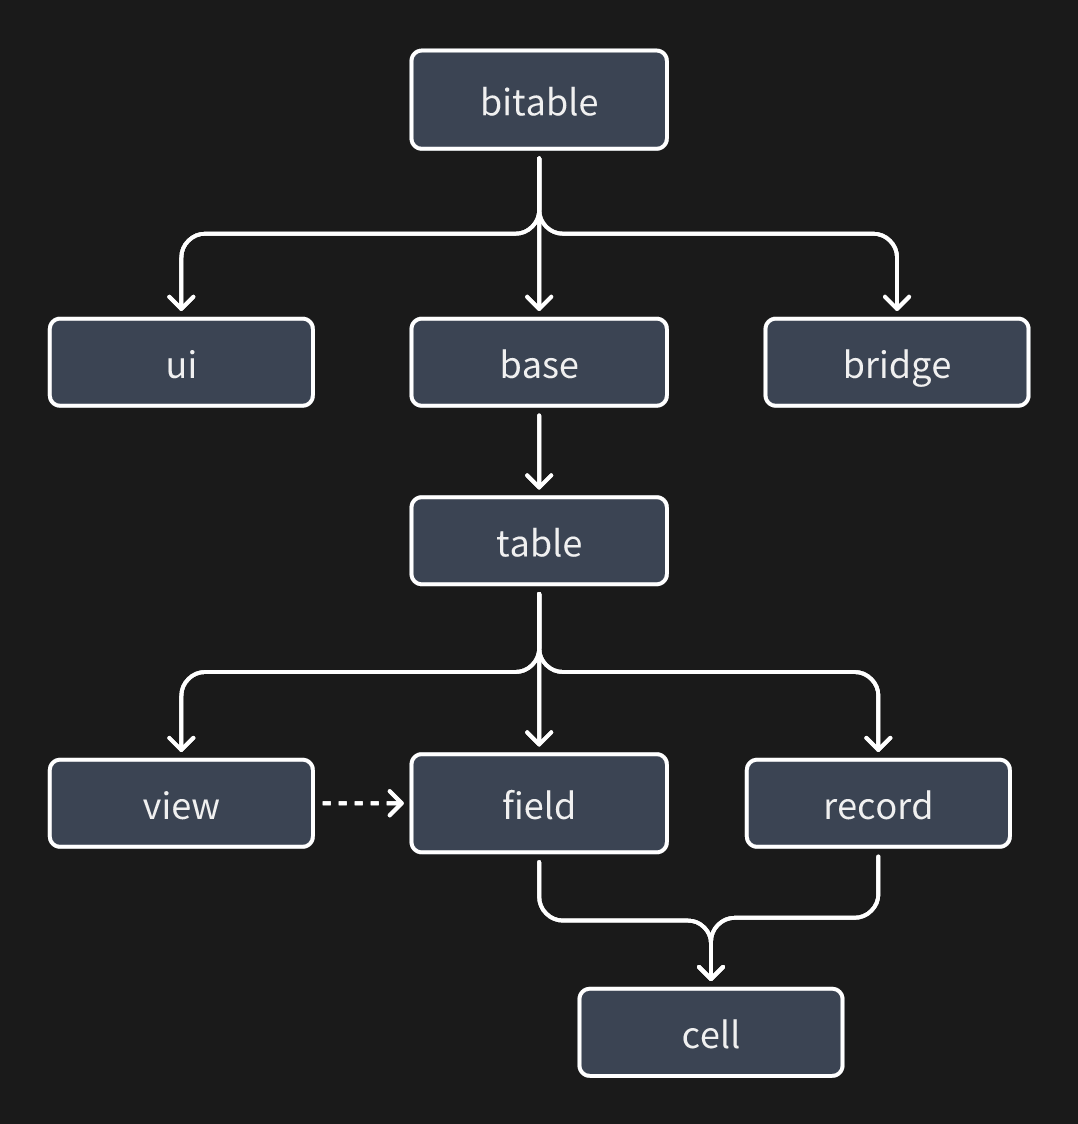
bitable is the entry point of the API. Modules like base, ui, bridge, etc. are mounted as properties on it. They can be used as follows:
import { bitable } from '@lark-base-open/js-sdk'
const table = await bitable.base.getActiveTable();
const attachmentFieldList = await table.getFieldListByType<IAttachmentField>(FieldType.Attachment);
import { bitable } from '@lark-base-open/js-sdk'
const table = await bitable.base.getActiveTable();
const attachmentFieldList = await table.getFieldListByType<IAttachmentField>(FieldType.Attachment);The modules such as table, field, etc. can be found in the following diagram:
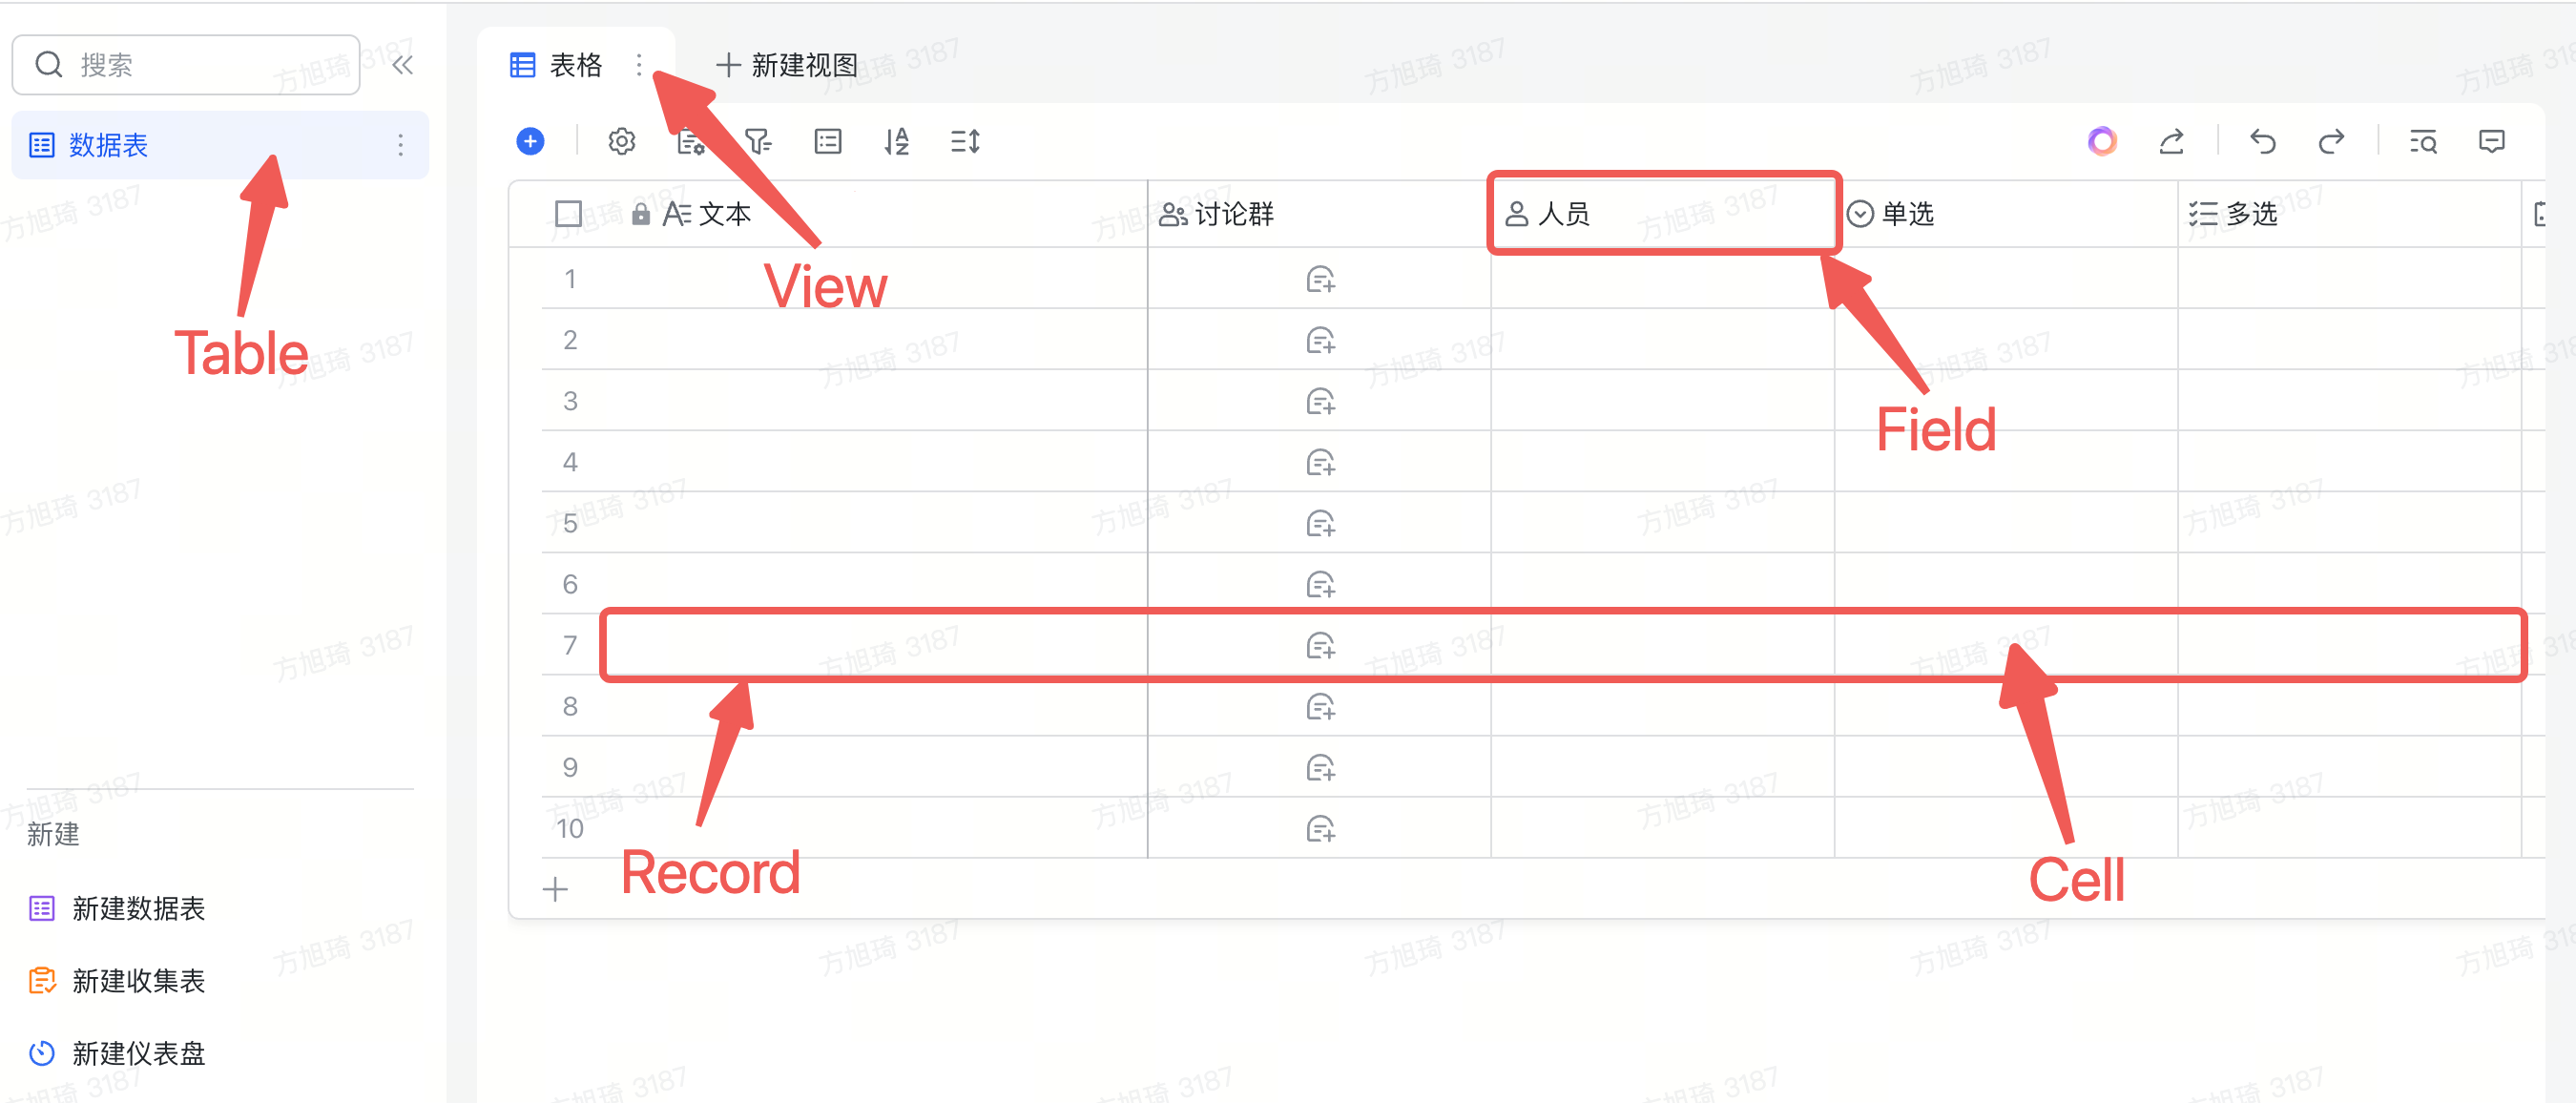
Let's introduce the concepts of each module:
base: Thebasemodule can be understood as a collection of multipletables. You can use the API to get the correspondingtable. It also includes application-level APIs such as file upload.table: Thetablemodule is a collection of data and does not involve the UI display on the page. Its concept is similar to tables in databases: it containsfieldsandrecords. In a multidimensional table, thetablealso includes the concept ofviews(when obtaining field information at thetablelevel, it is often unordered because thetablelevel only contains data and cannot know how it is displayed in theviews).field: Thefieldmodule contains many different field types, such asIAttachmentFieldand theICurrencyFieldwe will use later.Fieldprovides methods for many field operations and setting field properties. For example, it provides a method to add options for multi-select/single-select fields. You can refer to the corresponding API documentation for detailed methods. We also recommend that you start with fields and combine them withrecordsto perform CRUD operations on data, and get thecellof atableor create acellusing thecreateCellmethod.record: Therecordmodule is mainly used to retrieve data. It can work together withfieldto retrievecells.cell: Thecellmodule represents a single cell, which is the data of a specific cell in arecordorfield. It also supports creating a cell by calling thecreateCellmethod of thefield. The created cell can be passed as a parameter when callingtable.addRecordto add a new record. When calling thecreateCellmethod, for the convenience of developers, the data structure is simplified. After the created cell is inserted into thetable, it will be automatically associated with arecord. After the association, thegetValue/setValuemethods of thecellwill be associated with the data of thetable, making it real-time.view: Theviewmodule is the view module. Its main purpose is to determine the display method (order/visibility) offieldsandrecordsin the current view (table view/board view). Therefore, in theviewlayer, when retrieving field information/record order offieldsandrecords, they often match the current display content (when retrieving this information at thetablelevel, it is often unordered because thetablelevel cannot determine the display format).ui: Theuimodule is responsible for the API of the plugin's display window UI, which is related to the application capabilities of the plugin.bridge: Thebridgemodule mainly provides application-level interfaces, such as theme switching event notification, etc., which are related to the application capabilities.
Next, let's set up the development environment.